Greetings once again InterWebs! It has been a while but I am still here, struggling a bit with a broken laptop and busy work schedule, but I have managed to find a bit of time to spend in the hobby room. I managed to finish building the rest of the 'Space Hulk' themed bases, primer, paint, and seal them all!
Here is a quick shot of the group of bases 'painted clean' before weathering:
So, how did I get there you might ask? Following up on my previous
post explaining how I built the bases to begin with I set out to finish building the last of the bases needed and finish the two custom bases for the two 'special' Terminators (the Librarian and the kneeling fellow) that require their own special bases.
Here are some views of the last of the bases being built:
One of the unique Terminators in the Space Hulk set is a fellow that is kneeling down ripping up the deckplate. I felt he should have a base built that showed why he is ripping up the deckplating.
Here are some shots of his base build:
I tried to show the effects of a powerfist buckling the surrounding structures (pipe and girder) while it is tearing through the deckplate:
The other special base needed was for the Librarian (and his built in steps). I had started a base for him in the last post but was not happy with it so I started over. Of course when it came time to paint all of the bases I totally forgot to grab him and paint his along with all the others! Ha!
Here is the new base for the Librarian:
Now that all the bases were built I got them primered. While waiting for the primer to dry I worked on the Terminators a bit to get them ready to assign bases to individual models. I had to fully remove the molded on base the Terminators came with.
They looked like this:
Now came the fun part! I had to assign a base to a certain individual model to ensure that the model fits on the base correctly without being overwhelmed by the base details. I did not want to try and do this at the end with everything painted only to find out that some of the models did not fit correctly. It was a simple matter of trail and error, testing the fit and look of the models on the bases.
It looked something like this:
Now, how to ensure that the models assigned to a certain base stay with that base? I want to paint them both separately to give them both the best paint job I could (they deserve it!). I figured I would just number the models and bases, that way #1 goes with base #1.
Looking like this when everything was labeled:
That was the last step before paint! I spent some time before I started painting the bases and looked around the Internet for some ideas on painting metal deckplating. I found several great posts including several from Ron over at
From the Warp. Ron has three posts that I found useful and you should check them out
here,
here, and
here. I also found a nice post from
The Painting Corps that I found helpful. Thanks to these posts I set out to paint the bases. The first step was to paint all of the bases to a 'clean' state.
Here are some shots of the 'clean' bases:
A couple of close-up shots:
Now, after looking at my reference blog posts from 'From the Warp' and 'The Painting Corps', I pulled out the paints/inks/washes I would need for the weathering. These are what I used (minus Baal Red Wash):
I set out and really weathered up the bases. It didn't take long and it was quite fun actually. I took Ron's advice and used some green and red washes to simulate fluid stains (hydraulic, oil, etc.). All in all I am quite pleased with how they turned out after all the weathering. Of course they are a little dark but I did not want the bases to overpower the miniatures and a Space Hulk is NOT a clean place.
Here are a bunch of shots of the finished bases:
Backside:
Backside:
Backside (and apparently a change in Camera settings...hmmm):
Backside:
I thought some 'top-down' views might be nice:
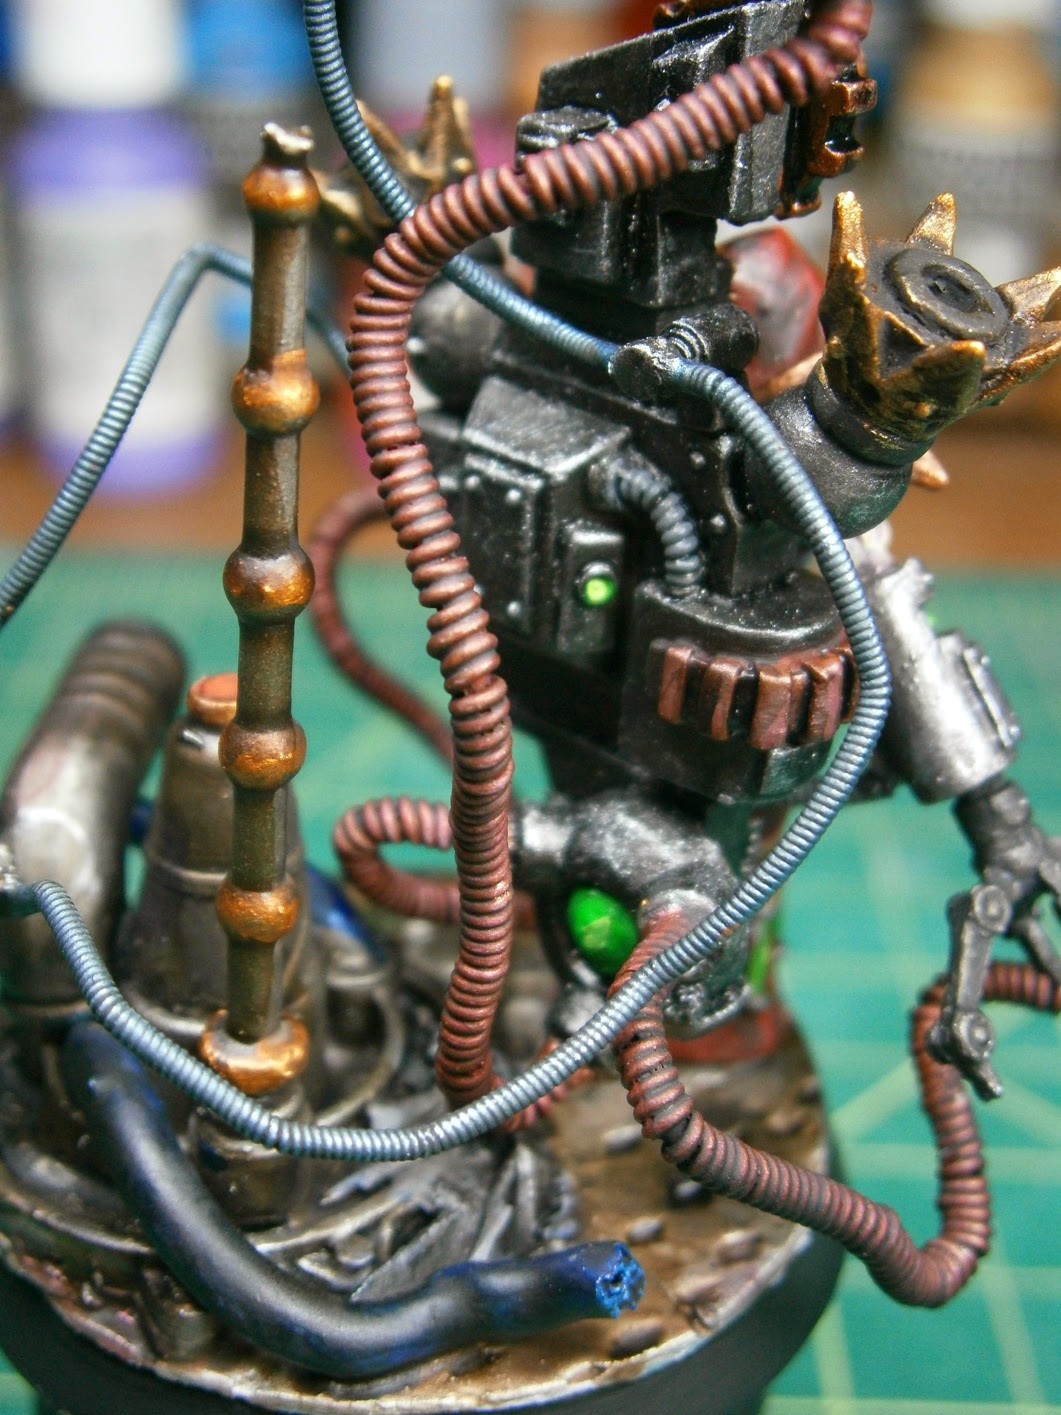
Here are some shots of the finished base for the kneeling down fellow:
I think I captured the feel of a powerfist ripping and buckling its way through the deckplating:
Thank you for putting up with a long post! I hope you enjoy these as much as I do. Take care InterWebs! Comments are always welcome!